Our Top 50 Tips for Climbing Mount Kilimanjaro

Mount Kilimanjaro, "the Roof of Africa," is more than just a mountain, it’s a life-changing journey. At 5,895 meters (19,341 feet), it’s the highest free-standing mountain in the world, and reaching Uhuru Peak is a dream for thousands of trekkers each year. But let’s be honest: a successful climb is a significant challenge.
Success depends on meticulous preparation, unwavering patience, and the right mindset. To help you make the most of your adventure, we’ve gathered 50 essential tips from seasoned climbers, expert guides, and successful trekkers.
Whether you’re deep into your training or still daydreaming about the highest mountain in Africa, these insights will give you the best shot at standing on top of the continent.
Foundational Tips for Climbing Kilimanjaro: Planning & Preparation
Your Kilimanjaro climb doesn’t start at the trailhead; it begins months in advance with crucial planning and preparation. Getting this stage right sets the foundation for a safe and successful journey.
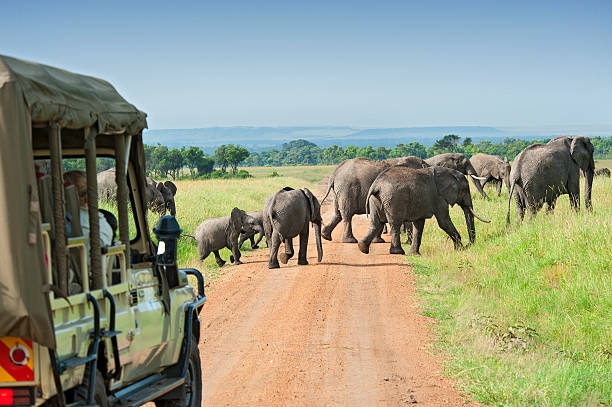
Choose the right route for your fitness and experience. Each trail offers a unique profile. The Machame route and Lemosho route are highly recommended for their scenic beauty and excellent acclimatization profiles. The Rongai route offers a drier, more remote experience, while the Marangu route is the only one with huts but has a steeper ascent profile.
Pick a route with more days to maximize acclimatization. Time is your best friend at high altitude. Opting for a longer route, such as an eight day trek, significantly increases your body's ability to adapt to lower oxygen levels. This is the single most effective way to boost your chances of reaching Uhuru Peak.
Avoid the rainy seasons. The best weather for climbing Kilimanjaro is during the dry seasons from January to early March and from August to October. Avoid the heavy rainy season in April, May, and November, which brings muddy trails, heavy clouds, and challenging conditions.
Book with reputable tour operators. Your safety is paramount. Choose an operator with a proven track record, certified guides, and a commitment to crew welfare (look for partners of the Kilimanjaro Porters Assistance Project). A good company will not cut corners on safety equipment or staff training.
Check what’s included in your climb price. Before booking, get a clear list of inclusions and exclusions. A comprehensive package should cover park fees, camping/hut fees, rescue fees, all meals on the mountain, guide and porter salaries, and transfers. This prevents unexpected costs later on.
Get travel insurance that covers high-altitude trekking. This is non-negotiable. Ensure your policy covers trekking up to 6,000 meters and includes emergency medical evacuation. Standard policies often exclude high-altitude activities, so read the fine print carefully.
Train 3–6 months ahead with hikes, cardio, and strength work. While you don’t need to be a professional athlete, good physical conditioning makes a big difference. Focus on cardiovascular endurance (running, cycling), leg strength (squats, lunges), and, most importantly, long training hikes with a weighted daypack.
Break in your hiking boots before the trip. Never arrive in Tanzania with brand-new boots. Wear them for several weeks on your training hikes to mold them to your feet. Well-worn boots are your best defense against painful blisters that could jeopardize your climb.
Research tipping guidelines and prepare for the tipping ceremony. Tipping your mountain crew is a vital and respected custom. Your operator will provide guidelines, so budget for this in advance. Preparing envelopes for your guides, cooks, and porters makes the tipping ceremony a smooth and appreciative experience.
If you have time, add a warm-up climb. An acclimatization hike up a nearby peak like Mount Meru (4,566m) is the perfect preparation. It allows your body to adapt to the altitude before you even set foot on Kilimanjaro, giving you a significant head start.
Your Guide to Warm Clothes and Own Gear: Packing Essentials
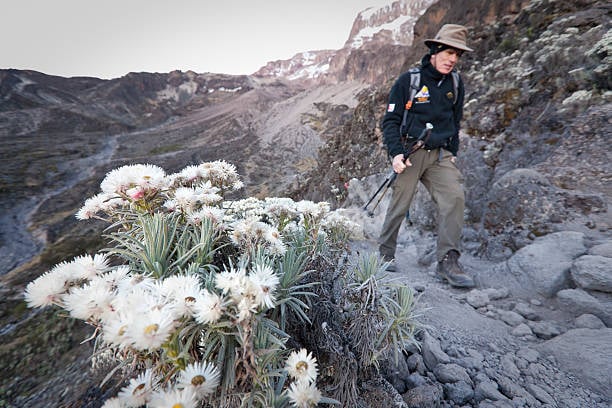
The right gear makes the difference between a comfortable, safe climb and a miserable, dangerous one. Packing correctly is a crucial part of your preparation.
Use the official packing list from your operator as a baseline. Your tour operator will provide a comprehensive list. Use this as your primary guide, as it is tailored to the specific route and season of your climb. Don't be tempted to add unnecessary weight.
Invest in quality boots with ankle support. Your feet are your most valuable asset. Purchase waterproof hiking boots that provide excellent ankle support to prevent twists on uneven terrain. Their quality will directly impact your comfort and endurance on the trail.
Bring a warm 4-season sleeping bag. Nighttime temperatures can drop well below freezing, especially at higher camps. A sleeping bag with a comfort rating of -10°C to -15°C (5°F to 14°F) is essential for a good night's sleep, which is critical for recovery. A hot water bottle can provide extra warmth.
Rent gear locally if you don’t want to fly with bulky items. If you don't own items like a sub-zero sleeping bag or a heavy down jacket, you can rent quality gear in Moshi or Arusha. This is a cost-effective and convenient option for many climbers.
Use trekking poles—your knees will thank you. Trekking poles are essential. They reduce the impact on your knees and leg joints by up to 30%, especially during the long descent. They also improve your balance and help you maintain a steady rhythm.
Pack moisture-wicking base layers. Cotton is a poor choice as it absorbs sweat and stays wet. Instead, choose base layers made from merino wool or synthetic fabrics. They pull moisture away from your skin, keeping you dry, warm, and comfortable.
A down jacket is essential for summit night. The cold on summit night is extreme and unlike anything most people have experienced. A high-quality, insulated down jacket is a mandatory piece of gear to protect you from hypothermia during the final ascent.
Carry 3–4 pairs of good hiking socks. Healthy feet are happy feet. Pack several pairs of wool or synthetic hiking socks to ensure you always have a dry, clean pair to wear. This simple step is one of the best ways to prevent blisters.
A headlamp with spare batteries is non-negotiable. You'll need a head torch for navigating around camp after dark and, most importantly, for the pre-dawn start of your summit attempt. Pack a fresh set of batteries and keep them warm to preserve their life.
Protect your gear with dry bags or Ziplocs. Even in the dry season, rain is always a possibility. Line your duffel bag and daypack with waterproof dry bags or heavy-duty plastic bags to ensure your clothes, sleeping bag, and electronics stay completely dry.
Crucial Health & Safety Tips for High Altitude
Altitude changes everything. Your primary goal on the mountain is to stay healthy and allow your body to acclimatize properly.
Learn the symptoms of altitude sickness. Be aware of the signs of Acute Mountain Sickness (AMS), which include headache, nausea, dizziness, and fatigue. Communicate any symptoms to your guide immediately. Hiding them is dangerous.
Follow the golden rule: Pole Pole (slowly, slowly). This Swahili phrase is the most important advice for climbing Kilimanjaro. A slow and steady pace from day one gives your body the best possible chance to acclimatize to the thinning air, conserving energy for summit night.
Master the art of drinking plenty of water. Hydration is a powerful tool against altitude sickness. Aim to drink 3–4 liters of water every day. Start sipping as soon as you wake up and continue throughout the day to help your body cope with the effects of high altitude.
Skip alcohol before and during the climb. Alcohol dehydrates the body, can mask the symptoms of altitude sickness, and hinders the acclimatization process. Save the celebratory drink for after you have safely descended the mountain.
Keep eating even if your appetite dips. It is common to lose your appetite at high altitude, but your body is burning thousands of calories a day. You must continue to fuel it. Prioritize carbohydrates and bring some of your favorite high-energy snacks from home.
Ask your doctor about Diamox (acetazolamide). If you are concerned about altitude, consult a medical professional about Diamox. This prescription medication can help your body acclimatize more quickly. It is a preventative measure, not a cure for severe AMS.
Carry a personal first-aid kit. While your guides will have a comprehensive medical kit, it is wise to carry a small personal kit with essentials like painkillers, blister plasters (moleskin), antiseptic wipes, and any personal medications you require.
Protect your hands and feet from the cold. Frostbite is a real risk, especially on summit night. Wear warm insulated gloves or mittens (and liner gloves) and proper hiking socks. Use chemical hand warmers for an extra layer of protection against extreme nighttime temperatures.
Use high-SPF sunscreen and lip balm. The sun's UV radiation is incredibly intense at high altitude, even on cloudy days. Apply a high-SPF sunscreen (SPF 30+) to all exposed skin and use a protective lip balm to prevent severe sunburn.
Trust your guide if they say it’s time to descend. Your guides are highly trained professionals with extensive experience in high-altitude environments. If they make the call that it is unsafe for you to continue, their decision is final and is made with your life in mind.
On the Mountain: The Daily Kilimanjaro Experience
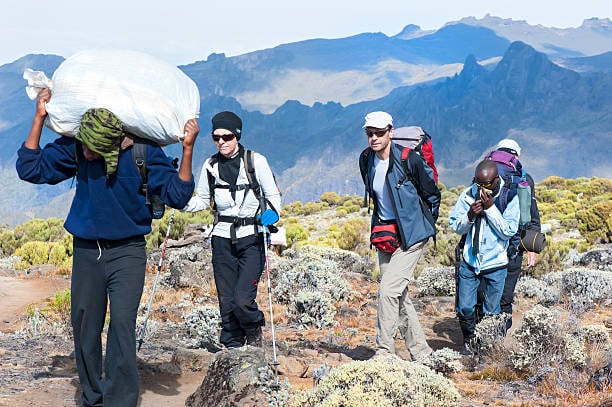
Once you are trekking, success comes down to rhythm, mindset, and fully immersing yourself in the journey through this unique environment.
Start slow, finish strong—conserve energy early. The first few days of the climb may feel easy, but it is crucial to maintain a slow, deliberate pace. This conserves vital energy that you will need for the much more challenging final ascent to the summit.
Keep your daypack under 7 kg. Your porters will carry the bulk of your gear in a duffel bag. Your daypack should only contain essentials for the day's trek: water, snacks, rain gear, warm layers, sunscreen, and a camera. A lighter pack means less strain on your body.
Breathe steadily, especially above 4,000 meters. As the oxygen levels decrease, focus on a consistent and deliberate breathing pattern. Deep, rhythmic breaths ensure your body gets as much oxygen as possible. Some climbers use the "pressure breathing" technique.
Take short, regular breaks. Listen to your body and take breaks when you need them. Short, 5-10 minute stops are more effective than long, infrequent ones, as they prevent your muscles from cooling down and stiffening up.
Hike your own pace—don’t compare yourself to others. This is your personal journey. Do not try to keep up with faster hikers or feel rushed. A steady pace that you can maintain all day is far more effective than hiking in short, fast bursts.
Record your journey in a journal or voice notes. The Kilimanjaro climb is an experience you will want to remember forever. Take a few minutes each evening to jot down your thoughts, feelings, and the memorable moments of the day.
Celebrate the milestones. Acknowledge your progress as you reach iconic landmarks like the Shira Plateau, the Lava Tower, and the dramatic Barranco Wall. Celebrating these achievements boosts morale and helps break the climb down into manageable sections.
Respect the mountain: leave no trace. Protect Kilimanjaro's fragile ecosystem for future generations. Pack out everything you bring in, stay on the designated trails, and use the provided toilet facilities.
Encourage your team—positivity is contagious. A positive attitude can make a huge difference during challenging moments. Encourage your fellow climbers and thank your mountain crew. This creates a supportive atmosphere that lifts everyone's spirits.
Carry a buff or scarf to protect against dust. The trails, especially at lower and mid-altitudes, can be very dusty. A buff, bandana, or scarf worn over your nose and mouth will make breathing more comfortable and protect your respiratory system.
The Ultimate Challenge: A Guide to Summit Night
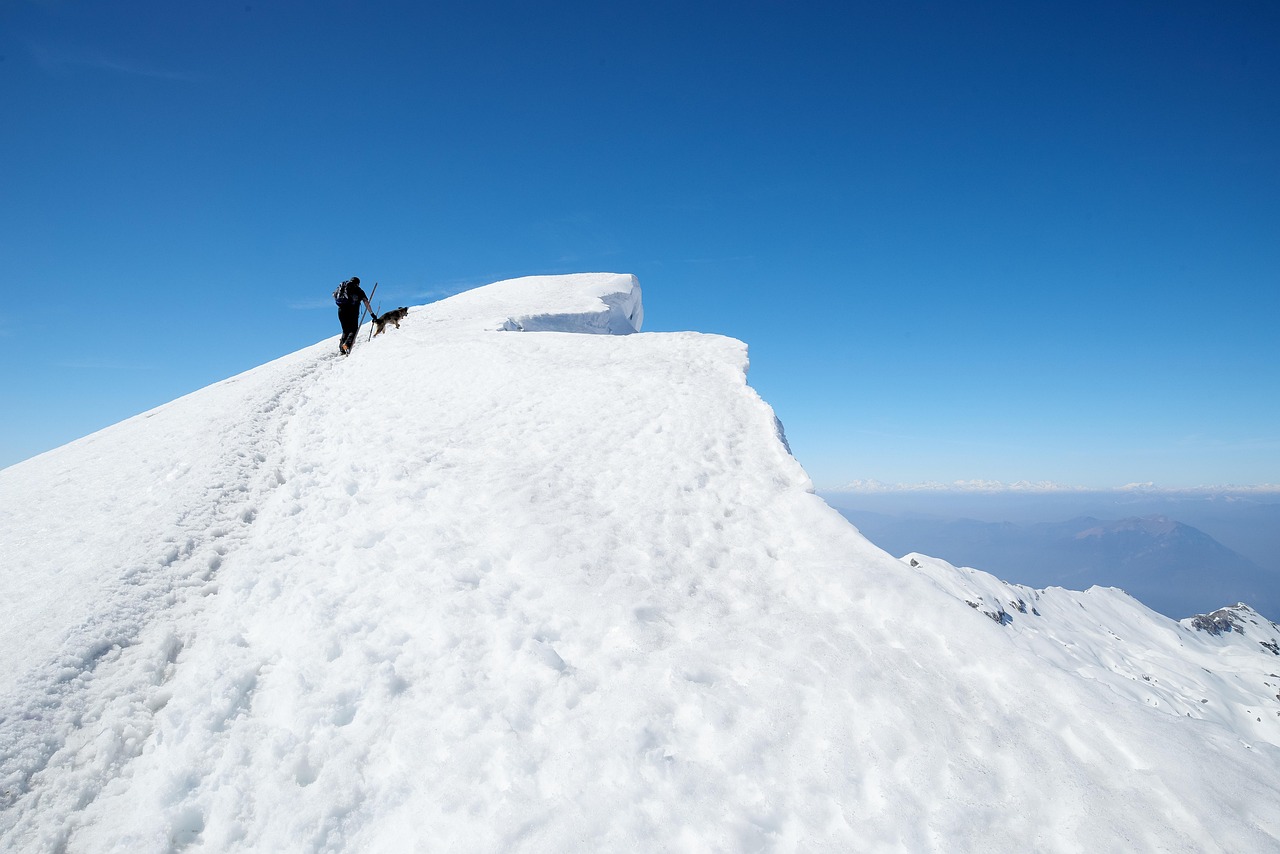
The final ascent is the toughest part of the climb but also the most unforgettable. This is where your physical and mental preparation truly pays off.
Dress in layers you can adjust quickly. Start the night wearing multiple layers, including your base layer, fleece, and down jacket. This allows you to manage your body temperature effectively as you exert yourself in the freezing cold.
Use chemical hand warmers inside your gloves. These small packets provide several hours of heat and can be a lifesaver for keeping your fingers and toes warm. Preventing your extremities from getting painfully cold allows you to focus on the climb.
Keep sipping water, even in the freezing cold. It’s easy to forget to drink when it's cold, but hydration is just as critical on summit night. Use an insulated bottle to prevent your water from freezing solid.
Carry snacks you can eat easily in the dark. Choose snacks that are easy to eat with gloves on and won't freeze solid, such as energy gels, chews, or a chocolate bar kept in an inside pocket. You will need the quick energy boost.
Focus on one step at a time—don’t stare at the top. Looking up at the endless line of headlamps can be demoralizing. Instead, focus on the small pool of light from your head torch, your breathing, and the rhythm of your guide’s feet.
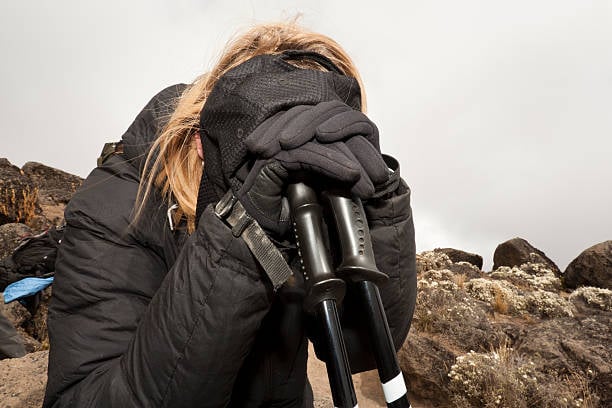
Expect mental battles—remind yourself it’s temporary. At some point, you will likely question why you are there and want to quit. This is normal. Remind yourself that this intense challenge is temporary, but the achievement of reaching the summit will last a lifetime.
Match your guide’s pace exactly. Your guide will set an incredibly slow and rhythmic pace designed for maximum efficiency and acclimatization. Trust it completely. Tucking in behind them and following their footsteps is the surest way to the top.
If you feel dizzy, pause, breathe, and continue slowly. The extreme altitude can cause moments of dizziness or lightheadedness. If this happens, stop for a moment, take several deep breaths, take a sip of water, and inform your guide before continuing at an even slower pace.
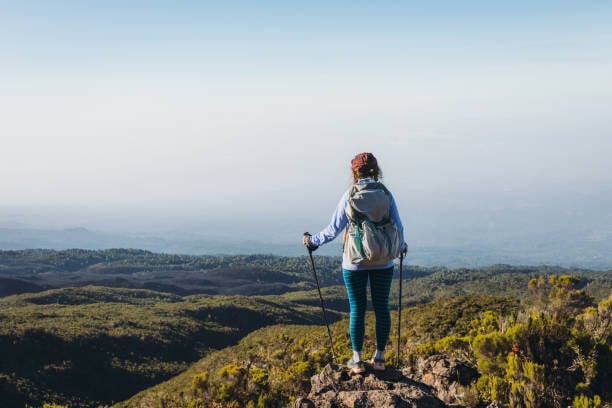
Dig deep for the final 200 meters—sunrise at Uhuru is magic. The final push from the crater rim at Stella Point to Uhuru Peak can feel endless. This is where you draw on your deepest reserves. The reward—watching the sunrise cast its first light over the glaciers and the African plains below—is a truly magical and life-affirming experience.
Descend carefully—your knees still need to get you home. Reaching the summit is only half the job. A long, steep descent awaits. Use your trekking poles, go slowly, and watch your footing. Most injuries occur on the way down when climbers are exhausted.
Final Thoughts
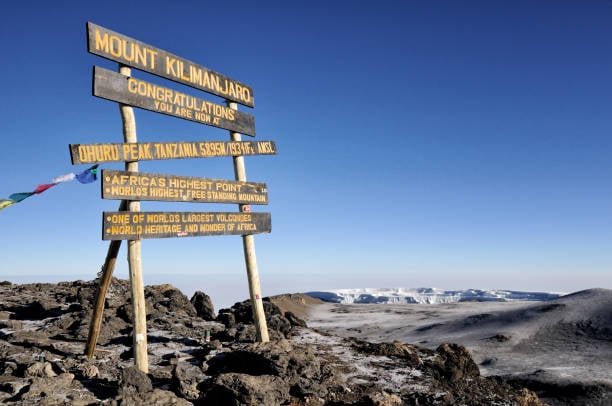
Reaching Uhuru Peak is an incredible achievement, but climbing Kilimanjaro is about more than the summit. It’s the camaraderie with your team, the landscapes that shift from rainforest to glaciers, and the profound lessons you learn about yourself along the way.
If you prepare well, pace yourself, and embrace the journey, Kilimanjaro won’t just be a mountain you climbed, it will be a story you’ll tell for the rest of your life.
Frequently Asked Questions About Climbing Kilimanjaro
How difficult is it to climb Kilimanjaro?
Kilimanjaro is considered a non-technical climb, meaning you don't need mountaineering skills like ropes or harnesses. However, it is a very strenuous trek due to the high altitude and long hiking days. The main challenge is the altitude, not the terrain. Anyone with a good level of fitness and strong determination can succeed.
What are the main symptoms of altitude sickness?
The most common symptoms of mild altitude sickness (AMS) are headache, nausea, loss of appetite, fatigue, and difficulty sleeping. It is vital to report any symptoms to your guide, as they can progress to more serious conditions if ignored.
Do I need previous trekking experience?
While previous high-altitude trekking experience is beneficial, it is not a requirement. Many first-time trekkers successfully climb Kilimanjaro. The most important prerequisite is a solid fitness level gained through consistent physical training.
What is the food like on the mountain?
You will be well-fed by a dedicated cook and kitchen crew. Meals are designed to be high in carbohydrates to provide energy. A typical menu includes porridge, eggs, and toast for breakfast; a packed lunch or hot lunch on the trail; and soup, rice, pasta, or potatoes with a meat or vegetable sauce for dinner.
How much should I tip the mountain crew?
Tipping is a standard practice and an important part of the crew's income. Most tour operators recommend a collective tip of approximately $250-$350 USD per climber for the entire crew. Your operator will provide a detailed breakdown of how to distribute it among the guides, cooks, and porters.
What is the success rate for climbing Kilimanjaro?
Success rates vary significantly by route. Shorter 5 or 6-day routes have lower success rates (50-70%) due to poor acclimatization. Longer 7, 8, or 9-day routes, like the Lemosho or Machame route, have much higher success rates, often exceeding 90%.
Can I rent my own gear in Tanzania?
Yes, you can rent most of the essential gear in Moshi or Arusha, the main gateway towns for Kilimanjaro. Items like sleeping bags, trekking poles, waterproof jackets and pants, and down jackets are widely available. However, it is highly recommended you bring your own well-broken-in hiking boots.
What happens in a medical emergency?
Reputable tour operators have robust safety protocols. Guides are trained in wilderness first aid and carry oxygen cylinders and extensive medical kits. In a serious emergency, a rescue team will be dispatched to evacuate the climber from the mountain, on a stretcher if necessary, to the nearest hospital. This is why comprehensive travel insurance is essential.